The petal box template, flat and folded
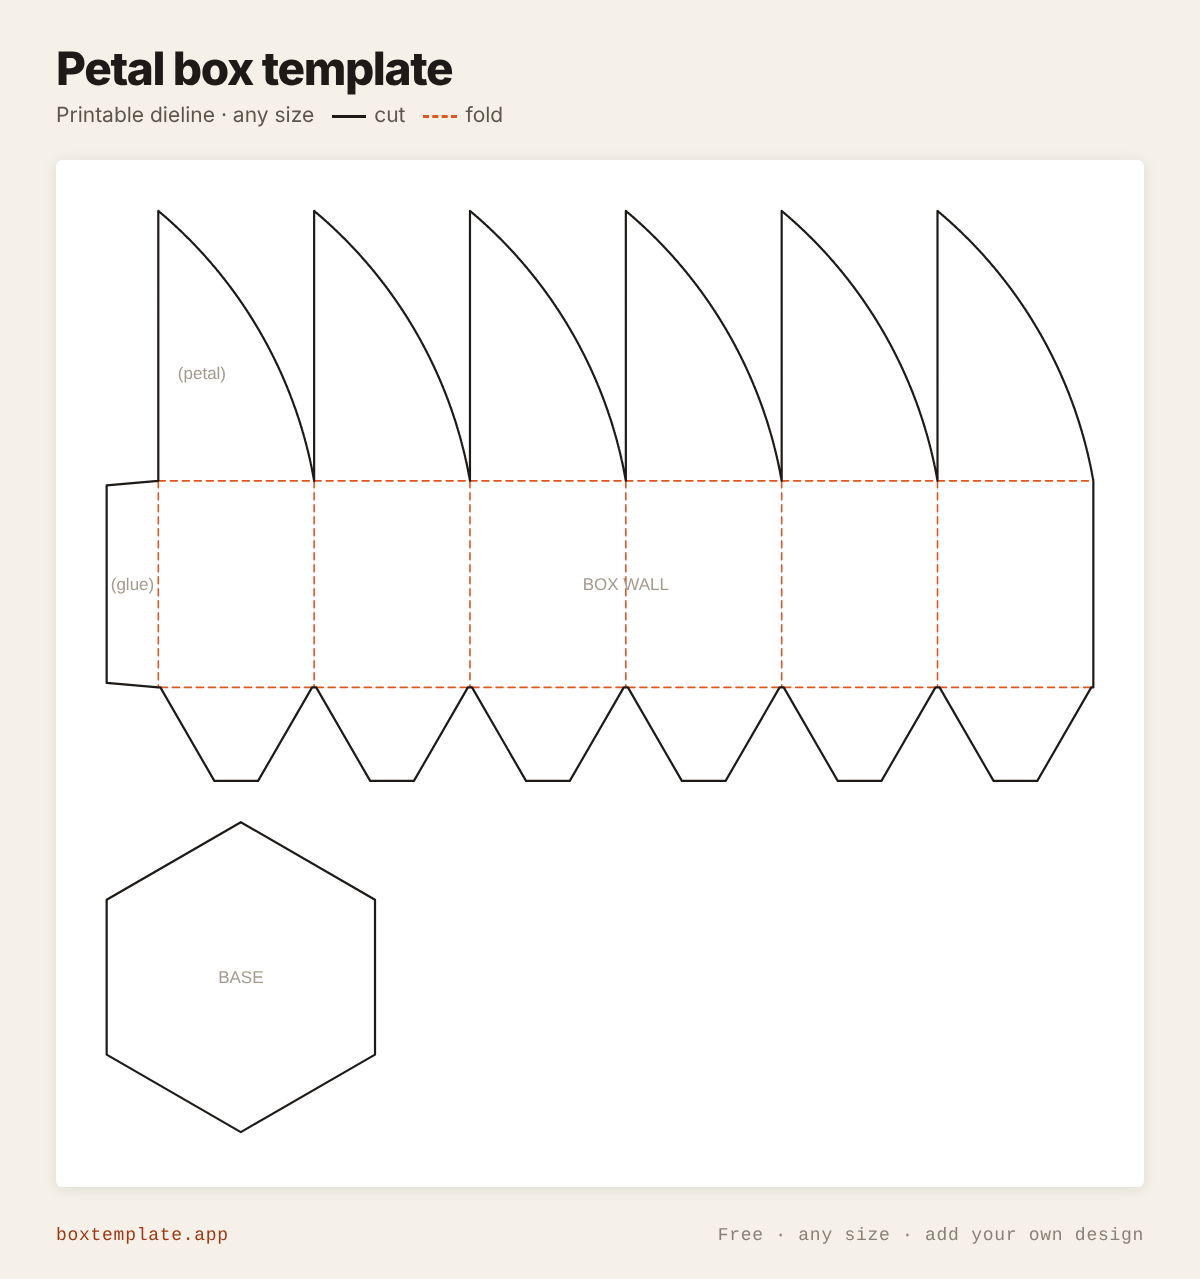
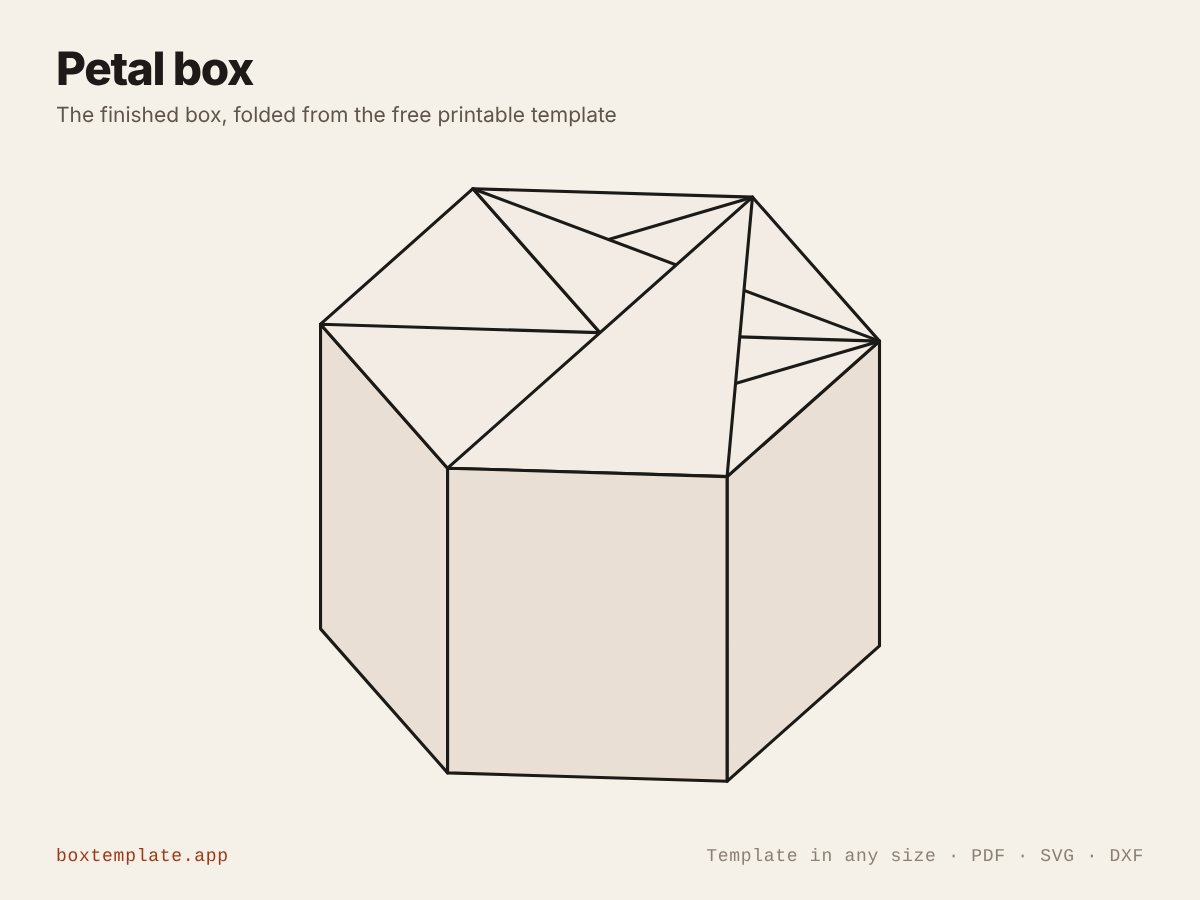
What this template is for
A box from three to twelve sides whose top closes with a swirl of petals — no lid, no tuck and no glue at the top. Set a tip length and the petals carry on into arms that stand up as a handle.
Also called twist close box · pinwheel box · flower box · swirl top box — all the same shape, and this is it.
- Wedding and party favour boxes
- Jewellery and small gift boxes
- Sweet and chocolate boxes
- Craft fair packaging that needs no ribbon
How to use this template
All four downloads are the same petal box at the same size — only the format changes.
Which file goes where: PDF, PNG, SVG or DXF
- PDF printing at home
- Print at 100 per cent, or hand it to a print shop as "actual size, no scaling".
- PNG 300 dpi Canva, Photoshop, Procreate
- Upload, lock it in place and design your petal box on top. Free plan and phone included. Full Canva walkthrough →
- SVG Cricut, Illustrator, Inkscape, Affinity
- Vector, with cuts, folds and labels on separate layers. Cricut and Silhouette walkthrough →
- DXF Silhouette, laser and vinyl cutters
- Two layers, CUT and FOLD — and the one free Silhouette Studio Basic will open.
Getting it printed properly → · Putting your own design on it →
Printing it
- Type your size above, then download the PDF.
- Print at 100% — never “fit to page”, or every measurement comes out wrong.
- Too big for the paper? Pick your paper size and leave Fit the pieces to the page ticked: each piece gets its own place on a sheet and the PDF comes out with every page in it, nothing cut in half and nothing to tape.
How to put it together
These pictures are the petal box itself, not a generic diagram — change the measurements above and the template changes, but the steps never do. The names in capitals are the labels printed on the template.
-
Cut the solid lines
Every solid line is a cut. Do the inside shapes first, while the sheet is still whole and easy to hold.
-
Score every dashed line
Dashed lines are folds. Score each one first — an empty ballpoint against a ruler — or the card cracks along the outside of the bend.
-
Step by step
- Cut out the BOX WALL with its petals, and the BASE.
- Crease every fold, including the curved line at the foot of each petal.
- Roll the wall up and glue the (glue) end tab inside the first panel.
- Fold the bottom flaps in and glue the BASE on top of them from inside.
- Fill it. Fold the petals down one after another going round, and slide the last one under the first.
Glue: a glue stick for paper, white PVA on card — hold each seam thirty seconds, and let it dry before you use it.
Questions about the petal box
How does the swirl close work?
Each wall carries one petal. You fold them down one after another going round, and slide the last one under the first. Each petal traps the one before it, so the top holds itself shut with no glue, no tape and no tuck flap.
How far do the petals reach?
To the apothem — the distance from the middle of a wall to the centre of the box. That puts each tip half a side length past the middle, which is what makes the petals overlap instead of leaving a hole. It is taken from your side length and number of sides, not typed in.
What is the petal curve for?
It bows the trailing edge of each petal outwards, which gives the rounded flower look. Set it to zero for straight-edged petals and a pointed star instead. If you ask for more bow than the panel has room for, it is eased back until the petals stay clear of one another.
How do I get the handle version?
Set a handle arm length. The petals then carry on past the middle into narrow round-tipped arms that stand up in a bundle when the box is closed, so you can pick it up by them. Leave it at zero for a plain flat top.
Templates like this one

In these collections: Wedding and party favour box templates
Guides: Boxes without glue
See all 150 templates · For Canva · For Cricut · For Etsy sellers · Getting it printed
Collections: Wedding and party favour box templates · Christmas box templates · Food box templates · Diwali mithai box templates