The paper cup template, flat and folded
What this template is for
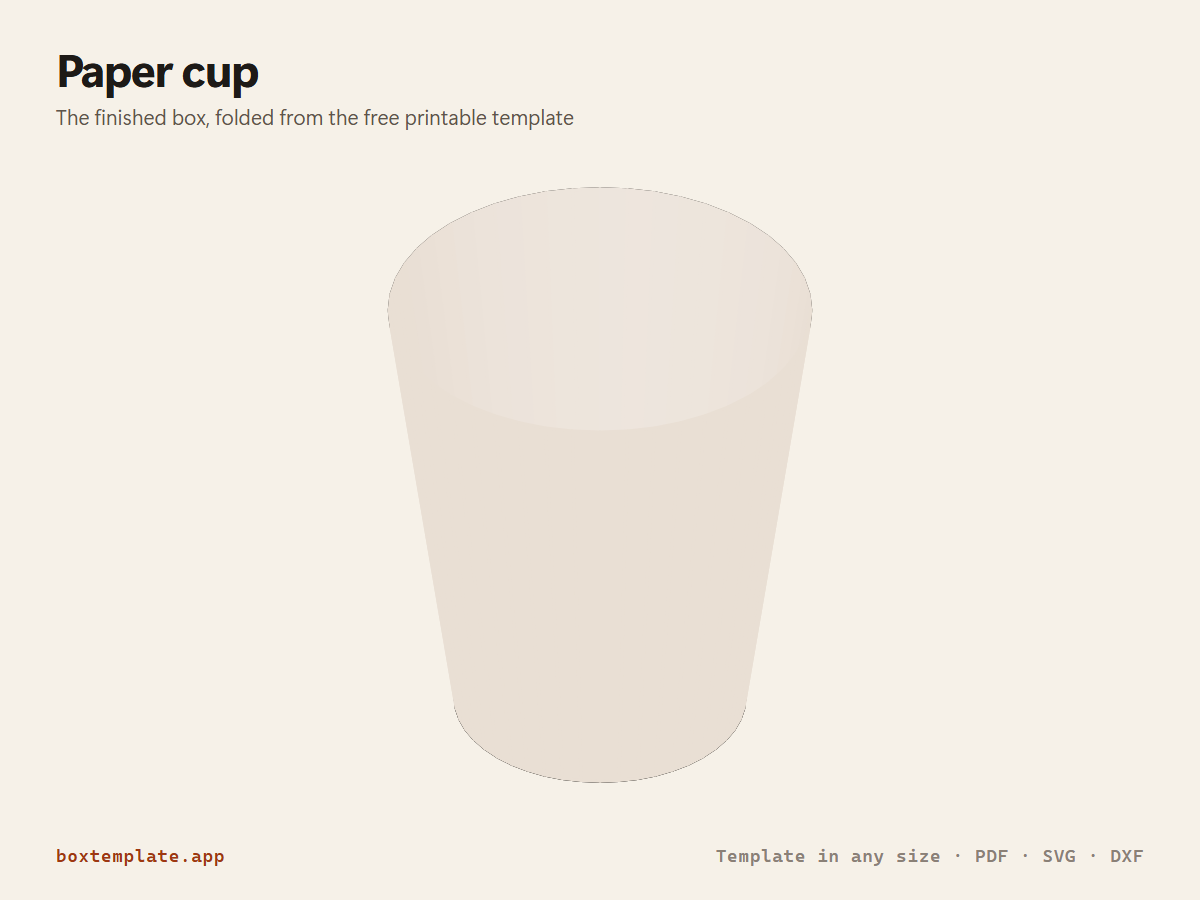
A cup that flares out to the rim, with a base glued in — or, with both diameters the same, a straight pen pot. Treats, popcorn, favours, pens and brushes, a plant pot cover.
Also called paper cup template · pen holder · popcorn cup · treat cup — all the same shape, and this is it.
- Popcorn, sweets and party treats
- Pen, pencil and brush holders
- Plant pot covers and gift cups
- Kids’ crafts and classroom projects
How to use this template
All four downloads are the same paper cup at the same size — only the format changes.
Which file goes where: PDF, PNG, SVG or DXF
- PDF printing at home
- Print at 100 per cent, or hand it to a print shop as "actual size, no scaling".
- PNG 300 dpi Canva, Photoshop, Procreate
- Upload, lock it in place and design your paper cup on top. Free plan and phone included. Full Canva walkthrough →
- SVG Cricut, Illustrator, Inkscape, Affinity
- Vector, with cuts, folds and labels on separate layers. Cricut and Silhouette walkthrough →
- DXF Silhouette, laser and vinyl cutters
- Two layers, CUT and FOLD — and the one free Silhouette Studio Basic will open.
Getting it printed properly → · Putting your own design on it →
Printing it
- Type your size above, then download the PDF.
- Print at 100% — never “fit to page”, or every measurement comes out wrong.
- Too big for the paper? Pick your paper size and leave Fit the pieces to the page ticked: each piece gets its own place on a sheet and the PDF comes out with every page in it, nothing cut in half and nothing to tape.
How to put it together
These pictures are the paper cup itself, not a generic diagram — change the measurements above and the template changes, but the steps never do. The names in capitals are the labels printed on the template.
-
Cut the solid lines
Every solid line is a cut. Do the inside shapes first, while the sheet is still whole and easy to hold.
-
Score every dashed line
Dashed lines are folds. Score each one first — an empty ballpoint against a ruler — or the card cracks along the outside of the bend.
-
Step by step
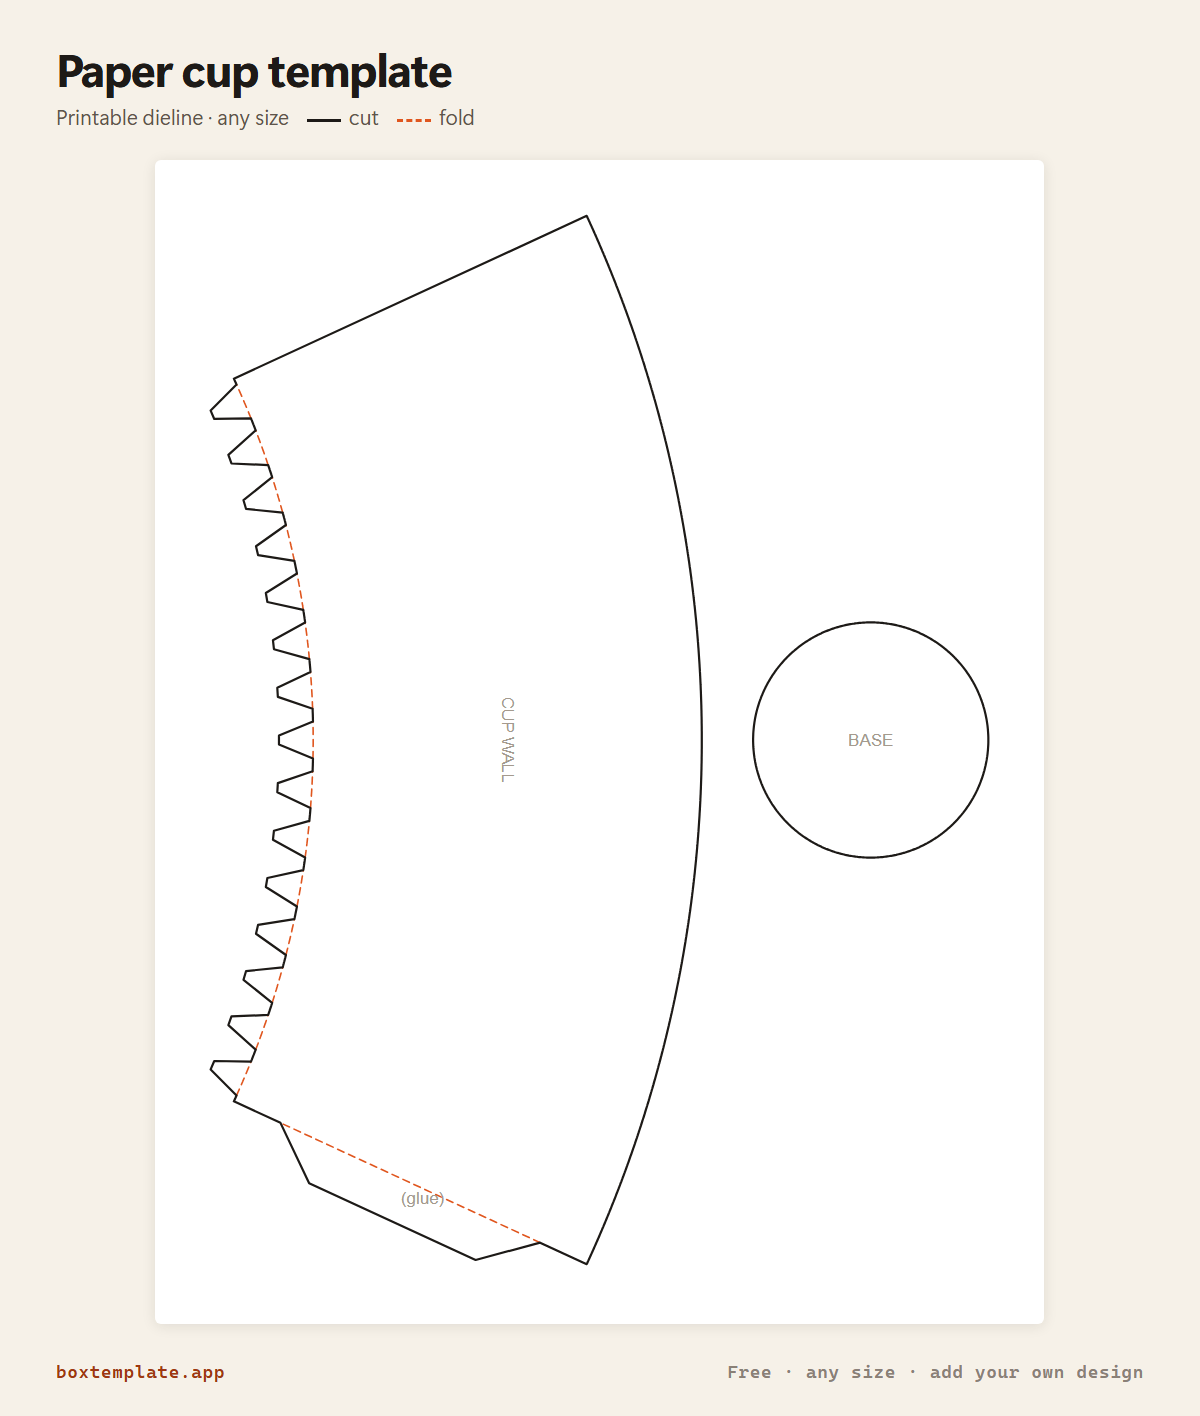
- Cut out the CUP WALL and the BASE.
- Roll the wall into a cone and glue the straight (glue) tab behind the far edge.
- Fold all the small tabs round the bottom inwards.
- Spread glue on the tabs and press the BASE disc down onto them from inside, running a pencil end round the edge.
Glue: a glue stick for paper, white PVA on card — hold each seam thirty seconds, and let it dry before you use it.
Questions about the paper cup
How is the wall worked out?
It is a cone with its point cut off, unrolled into a curved band. The band is developed on the middle of the board, so the bottom edge comes out exactly the length round the base disc and the top exactly the length round the rim you typed. The small tabs round the bottom fold in and the base glues on top of them.
Can I make a straight pen pot?
Yes — make the base diameter the same as the rim. Then there is no taper and the wall is a straight strip, the same wall the round box uses. Make the base bigger than the rim and it is set equal to the rim, because a cup is never wider at the bottom.
Will it hold drinks?
Not safely — card soaks through. Use it for dry things: sweets, popcorn, pens, a pot cover. For a drink you need board coated for food on the inside.
Will it print on one sheet?
Yes, at the size it opens with — an 80 mm rim, 55 mm base and 90 mm tall comes to about 182 × 245 mm with the base beside the wall, and fits A4 and US Letter. A very flared cup unrolls into a wide band and may need a bigger sheet.
Templates like this one

In these collections: Food box templates
See all 174 templates · For Canva · For Cricut · For Etsy sellers · Getting it printed
Collections: Wedding and party favour box templates · Christmas box templates · Food box templates · Diwali mithai box templates