The book box template, flat and folded
What this template is for
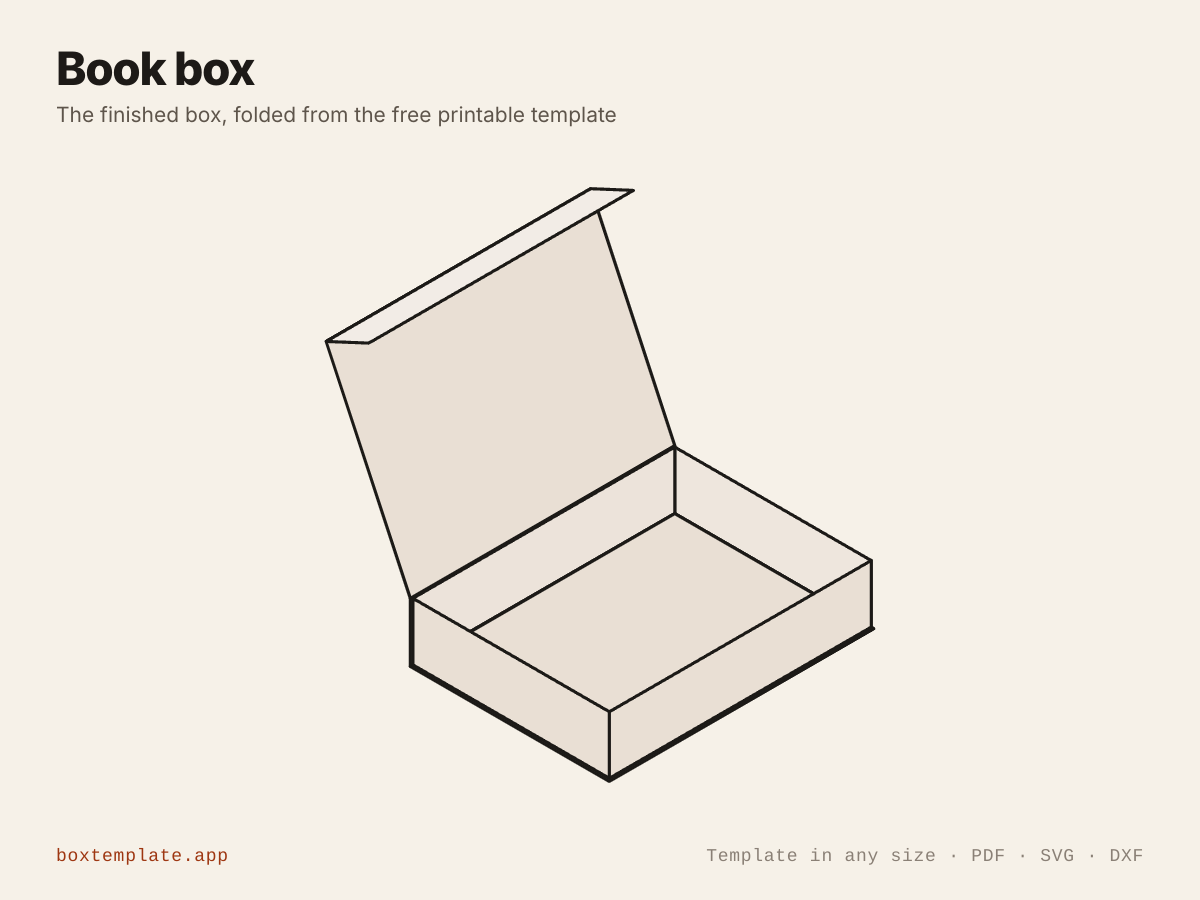
A box shaped like a book: a tray for the contents, and a case creased into a back cover, a spine and a front cover that closes over it with a tuck at the fore edge. Wedding favours, keepsake and memory boxes, gift cards.
Also called book shaped box · book gift box · hollow book box · book favour box — all the same shape, and this is it.
- Wedding and party favours
- Keepsake and memory boxes
- Gift card and voucher presentation
- Hidden storage on a bookshelf
How to use this template
All four downloads are the same book box at the same size — only the format changes.
Which file goes where: PDF, PNG, SVG or DXF
- PDF printing at home
- Print at 100 per cent, or hand it to a print shop as "actual size, no scaling".
- PNG 300 dpi Canva, Photoshop, Procreate
- Upload, lock it in place and design your book box on top. Free plan and phone included. Full Canva walkthrough →
- SVG Cricut, Illustrator, Inkscape, Affinity
- Vector, with cuts, folds and labels on separate layers. Cricut and Silhouette walkthrough →
- DXF Silhouette, laser and vinyl cutters
- Two layers, CUT and FOLD — and the one free Silhouette Studio Basic will open.
Getting it printed properly → · Putting your own design on it →
Printing it
- Type your size above, then download the PDF.
- Print at 100% — never “fit to page”, or every measurement comes out wrong.
- Too big for the paper? Pick your paper size and leave Fit the pieces to the page ticked: each piece gets its own place on a sheet and the PDF comes out with every page in it, nothing cut in half and nothing to tape.
How to put it together
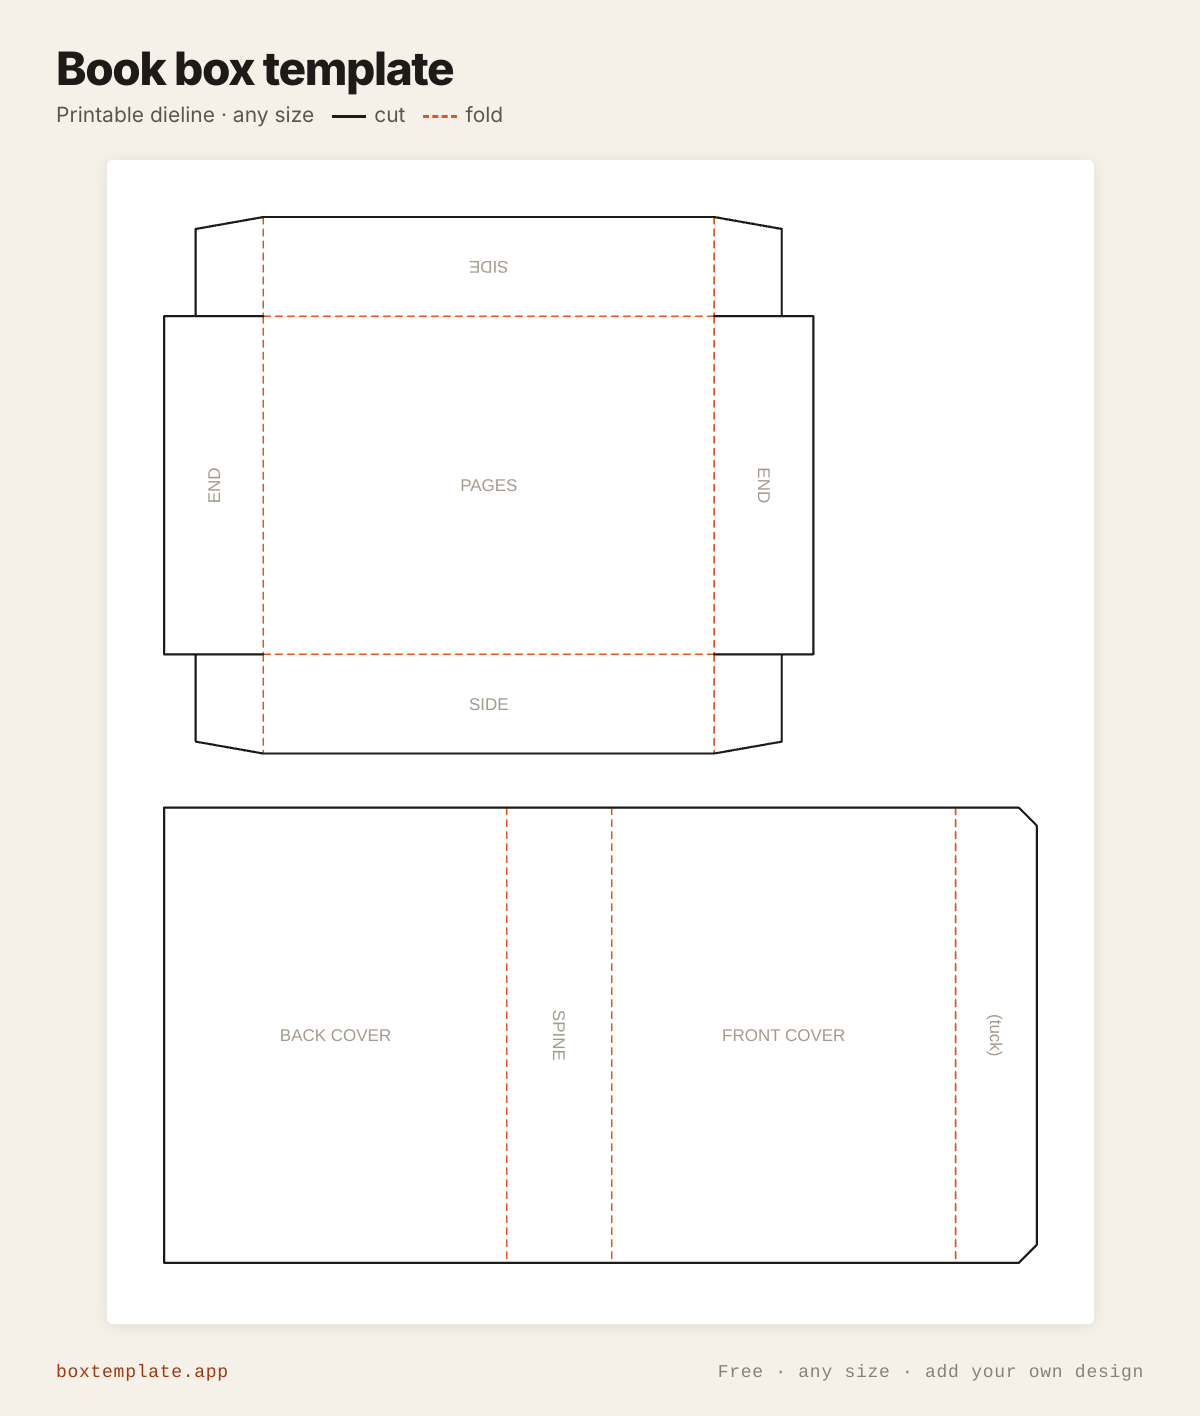
These pictures are the book box itself, not a generic diagram — change the measurements above and the template changes, but the steps never do. The names in capitals are the labels printed on the template.
-
Cut the solid lines
Every solid line is a cut. Do the inside shapes first, while the sheet is still whole and easy to hold.
-
Score every dashed line
Dashed lines are folds. Score each one first — an empty ballpoint against a ruler — or the card cracks along the outside of the bend.
-
Step by step
- Cut out the tray (PAGES) and the case (BACK COVER, SPINE, FRONT COVER).
- Fold the tray walls up and glue its four corner tabs.
- Crease the case on all three lines.
- Glue the BACK COVER flat to the underside of the tray.
- Close the FRONT COVER over the top and tuck its (tuck) flap down inside the far wall of the tray.
Glue: a glue stick for paper, white PVA on card — hold each seam thirty seconds, and let it dry before you use it.
Questions about the book box
How is this different from a box with a lid?
A box with a lid is two trays and the lid comes off. This is a tray with a case wrapped round it: the cover is hinged at a spine down one side, so it opens like a book and stays attached. That is what makes it read as a book on a shelf rather than as a box.
What do the three sizes mean?
Page height and page width are the inside of the tray — the space you actually get. Thickness is how deep the tray is, and it is also the width of the spine, because the spine has to span the tray it wraps. Type the space you need and the case is worked out around it.
Where does the glue go?
Two places, both easy to reach. The tray has four corner tabs. Then the whole BACK COVER panel of the case glues flat to the underside of the tray — a big area, so an ordinary glue stick holds it. Nothing is glued inside a box that is already shut.
Will it print on one sheet?
Yes, at the size it opens with — about 194 by 232 mm, which clears A4 with room for the margin your printer cannot reach. Make the pages much bigger than a paperback and it will outgrow the sheet; the tool tells you when it does, and offers bigger paper or the largest size that fits.
Templates like this one
In these collections: Christmas box templates
Guides: Drawer organisers and desk trays made to measure
See all 164 templates · For Canva · For Cricut · For Etsy sellers · Getting it printed
Collections: Wedding and party favour box templates · Christmas box templates · Food box templates · Diwali mithai box templates