The dispenser box template, flat and folded
What this template is for
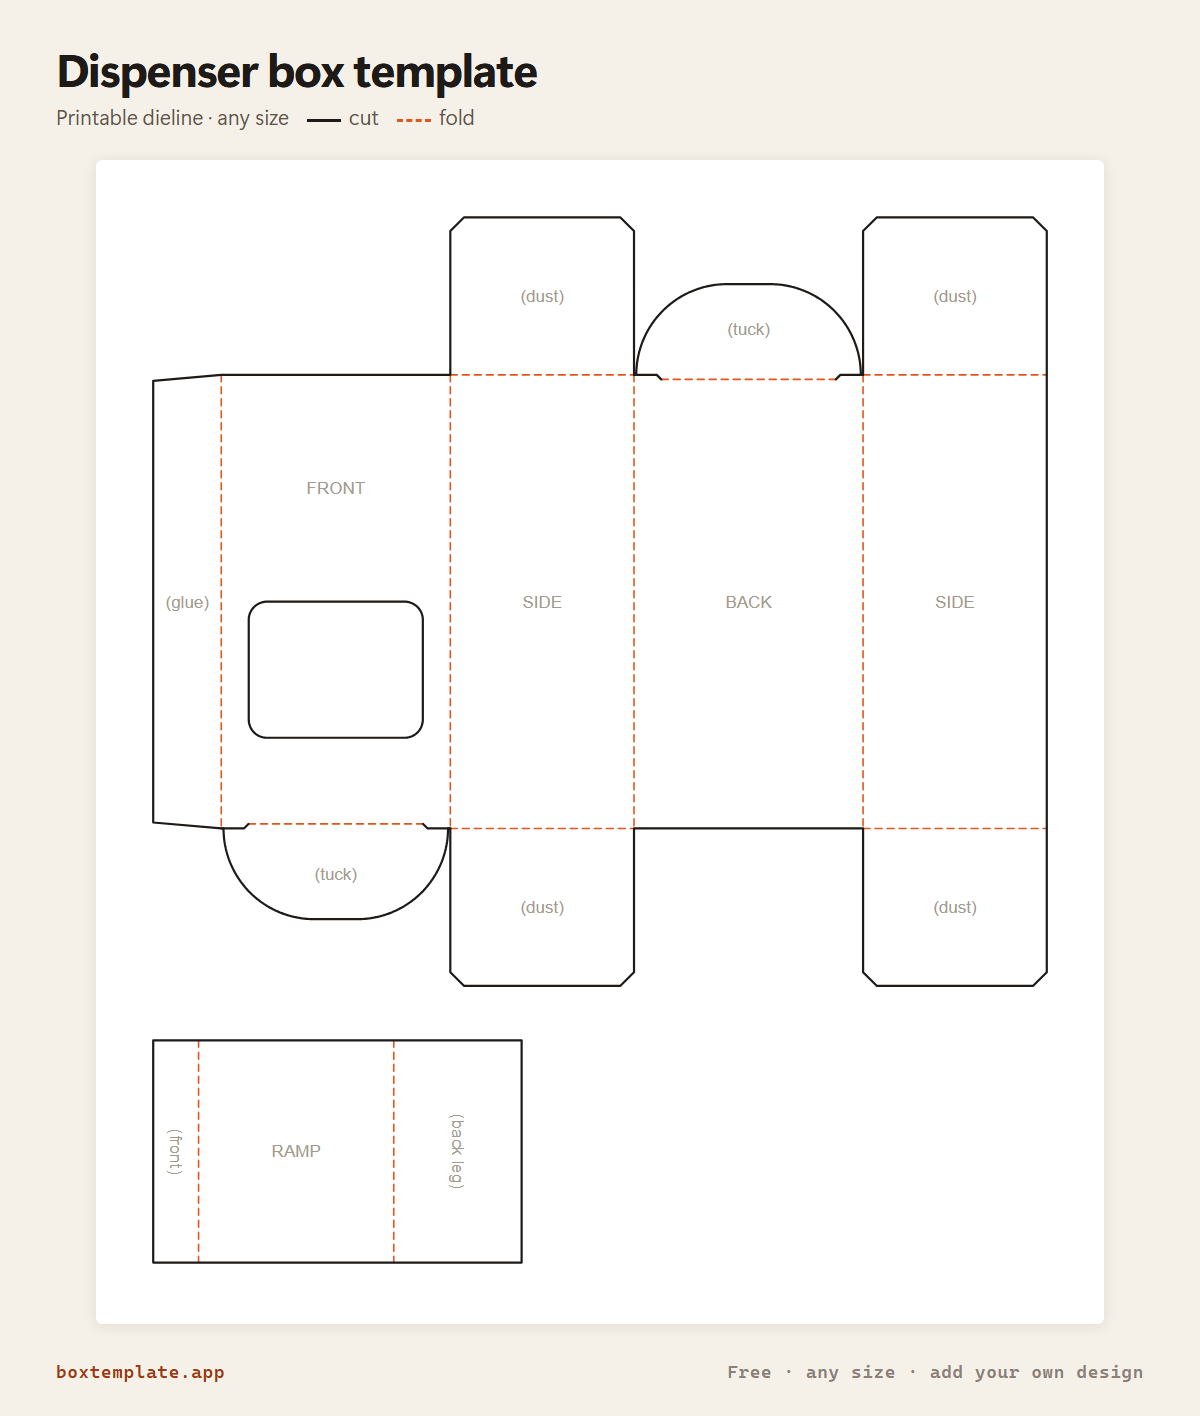
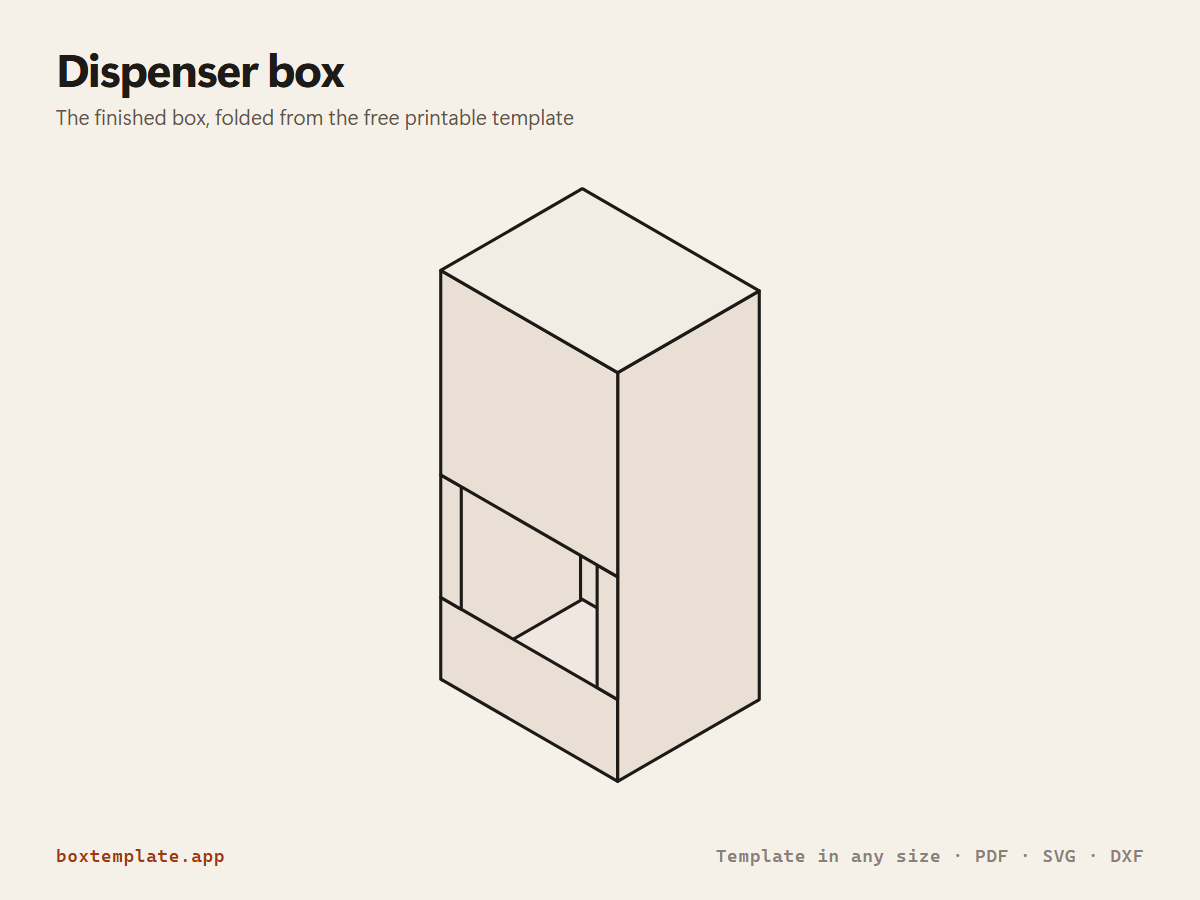
A carton you fill from the top and take from the bottom: an opening across the foot of the front, and a ramp inside that rolls everything forward to it. Sweets, nuts, tea bags, gloves, samples.
Also called candy dispenser box · gravity feed box · tea bag dispenser · counter dispenser — all the same shape, and this is it.
- Sweets, nuts and snacks
- Tea bags and coffee pods
- Gloves, masks and wipes
- Samples and counter giveaways
How to use this template
All four downloads are the same dispenser box at the same size — only the format changes.
- PDF printing at home
- Print at 100 per cent, or hand it to a print shop as "actual size, no scaling".
- PNG 300 dpi Canva, Photoshop, Procreate
- Upload, lock it in place and design your dispenser box on top. Free plan and phone included. Full Canva walkthrough →
- SVG Cricut, Illustrator, Inkscape, Affinity
- Vector, with cuts, folds and labels on separate layers. Cricut and Silhouette walkthrough →
- DXF Silhouette, laser and vinyl cutters
- Two layers, CUT and FOLD — and the one free Silhouette Studio Basic will open.
Printing it
- Type your size above, then download the PDF.
- Print at 100% — never “fit to page”, or every measurement comes out wrong.
- Too big for the paper? Tick Split across several sheets: it tiles across as many as it needs, with overlaps and matching letters to tape together.
How to put it together
These pictures are the dispenser box itself, not a generic diagram — change the measurements above and the template changes, but the three steps never do.
-
Cut the solid lines
Every solid line is a cut. Do the inside shapes first, while the sheet is still whole and easy to hold.
-
Score every dashed line
Dashed lines are folds. Score each one first — an empty ballpoint against a ruler — or the card cracks along the outside of the bend.
-
Fold, glue and hold
Cut the opening out first. Build the carton like a card box: glue the side seam and tuck the bottom shut. Fold the RAMP on both creases so its legs point down, and drop it in with the tall leg against the back. Fill from the top and close the top tuck.
Glue: a glue stick for paper, white PVA on card — hold each seam thirty seconds, and let the box dry standing up.
Questions about the dispenser box
- How does it dispense?
- The ramp inside stands on two legs, tall against the back wall and short against the front, so whatever you pour in slides down to the front. The opening is cut across the bottom of the front wall with a lip under it, and the ramp stops below that lip, so things come to rest in a small trough where your fingers can reach them instead of falling out.
- Can I change the ramp?
- Set the ramp angle: 20 to 30 degrees suits sweets and nuts; flat things like tea bags want less, sticky things more. If the box is too short for the angle you ask for, the ramp is made as steep as the box allows and the tool says so.
- Will it print on one sheet?
- Yes, at the size it opens with — the carton and the ramp together are about 197 × 230 mm and fit A4 and US Letter. A taller or wider dispenser needs A3.
- Is the size inside or outside?
- Inside, like the card box it is built from: each panel carries one board thickness extra so the space you type is the space you get. The ramp is a millimetre narrower than the inside so it drops in.
Print your own design on it
Add a logo, photo or pattern in the panel on the left and drag it onto the dispenser box. It is trimmed to the cut outline, embedded properly in the PDF, and never leaves your computer — most free template sites hand you the outline and stop there. How printing your own design works.
Templates like this one
See all 59 templates · For Canva · For Cricut · For Etsy sellers · Getting it printed
Collections: Wedding and party favour box templates · Christmas box templates · Food box templates