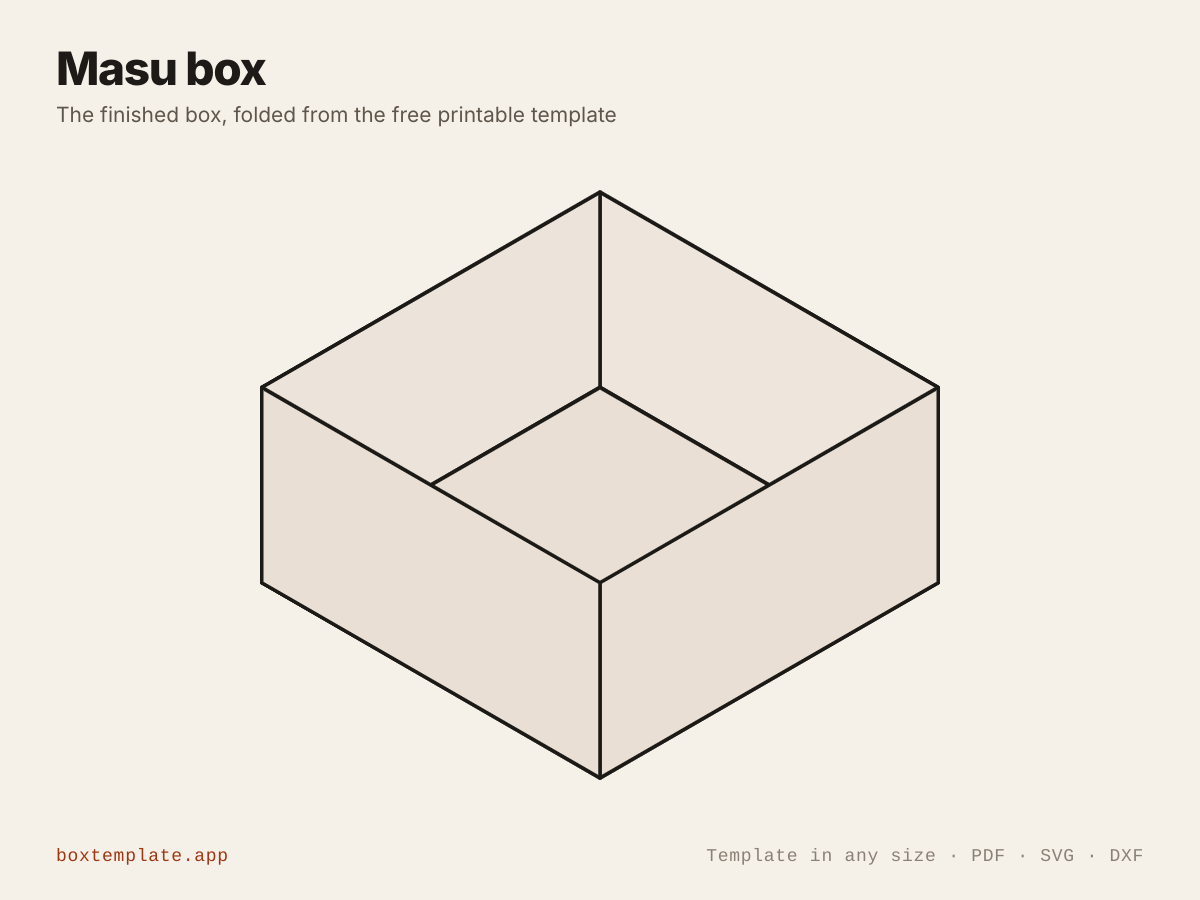
The masu box template, flat and folded
What this template is for
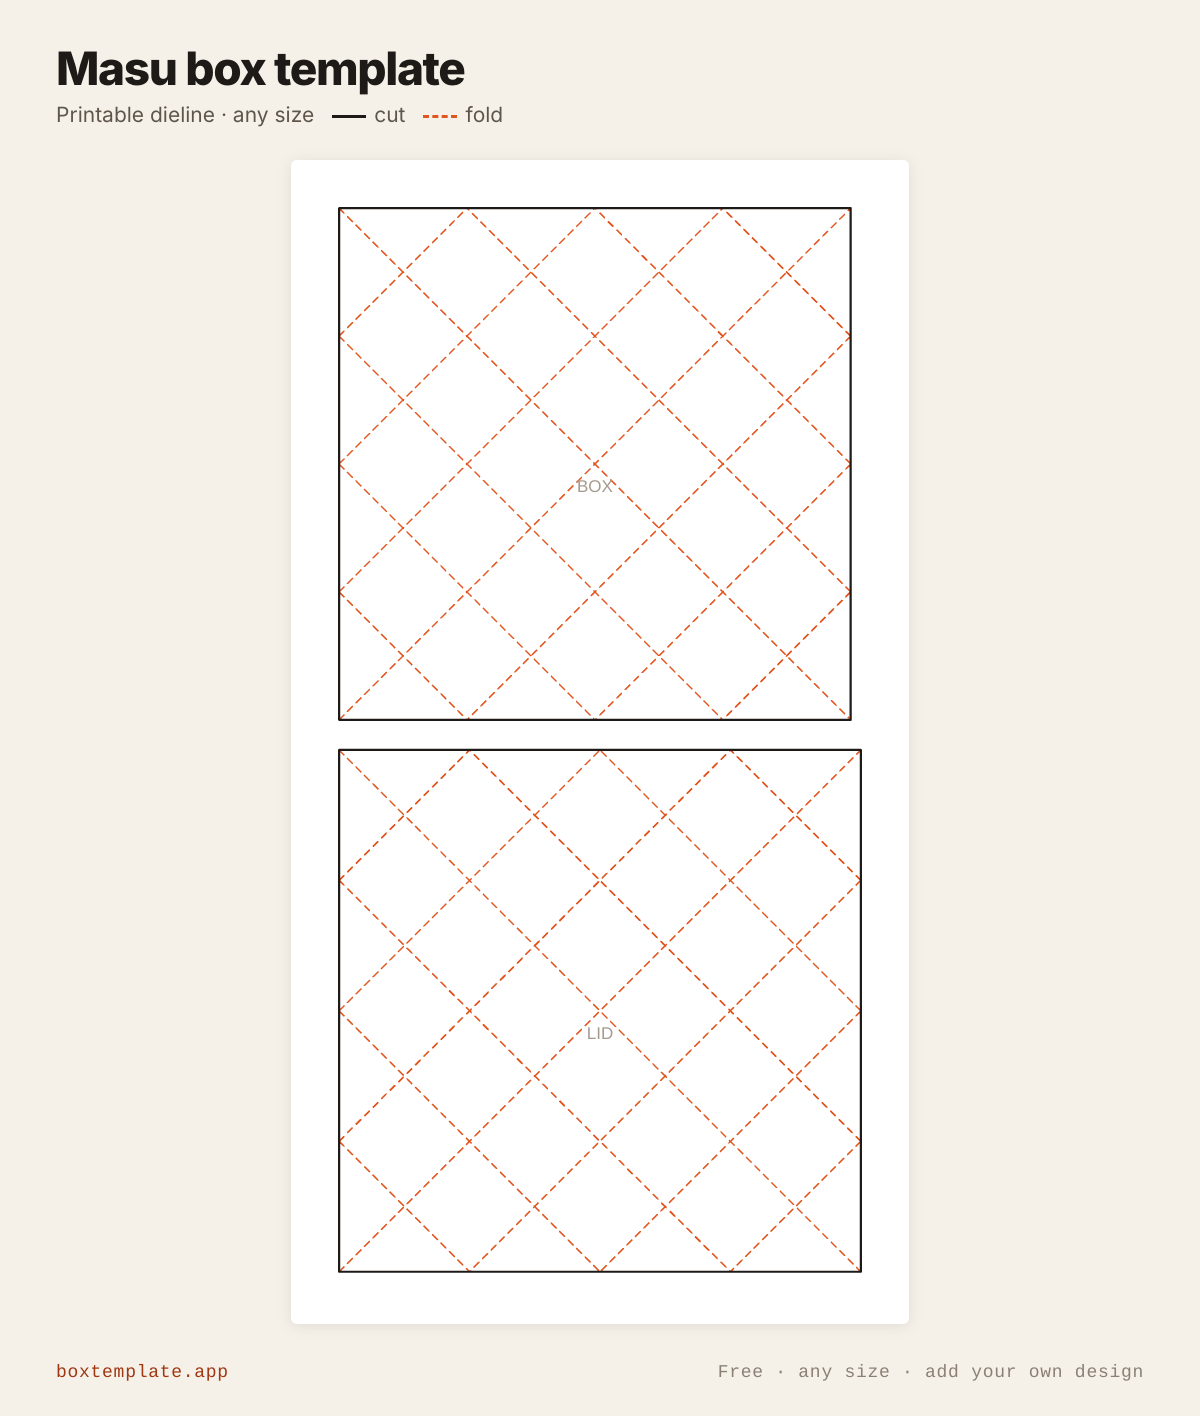
The traditional origami box from one uncut square of paper — no cutting inside it, no glue. Type the box you want; you get the exact square to start from, with every crease marked, and a slightly bigger one for the lid.
Also called origami box · masu box with lid · paper box from a square · origami gift box — all the same shape, and this is it.
- Origami lessons and paper crafts
- Small gift and sweet boxes
- Desk trays for clips and pins
- Party favours from patterned paper
How to use this template
All four downloads are the same masu box at the same size — only the format changes.
- PDF printing at home
- Print at 100 per cent, or hand it to a print shop as "actual size, no scaling".
- PNG 300 dpi Canva, Photoshop, Procreate
- Upload, lock it in place and design your masu box on top. Free plan and phone included. Full Canva walkthrough →
- SVG Cricut, Illustrator, Inkscape, Affinity
- Vector, with cuts, folds and labels on separate layers. Cricut and Silhouette walkthrough →
- DXF Silhouette, laser and vinyl cutters
- Two layers, CUT and FOLD — and the one free Silhouette Studio Basic will open.
Printing it
- Type your size above, then download the PDF.
- Print at 100% — never “fit to page”, or every measurement comes out wrong.
- Too big for the paper? Pick your paper size and leave Fit the pieces to the page ticked: each piece gets its own place on a sheet and the PDF comes out with every page in it, nothing cut in half and nothing to tape.
How to put it together
These pictures are the masu box itself, not a generic diagram — change the measurements above and the template changes, but the three steps never do.
-
Cut the solid lines
Every solid line is a cut. Do the inside shapes first, while the sheet is still whole and easy to hold.
-
Score every dashed line
Dashed lines are folds. Score each one first — an empty ballpoint against a ruler — or the card cracks along the outside of the bend.
-
Fold, glue and hold
Cut the square out exactly. Crease every line both ways. Fold all four corners to the middle. Fold two opposite edges to the middle and unfold, then the other two. Unfold two opposite corners. Lift the two long sides up as walls; push the ends in along their creases so each corner folds inside, and fold the loose corner point over the wall and down into the bottom. Repeat at the other end. Make the lid the same way from the LID square.
Glue: a glue stick for paper, white PVA on card — hold each seam thirty seconds, and let the box dry standing up.
Questions about the masu box
- How big a square do I need?
- The square is 2√2 (about 2.83) times the box width. A 60 mm box needs a square just under 170 mm. The walls come out half the width, so 30 mm high.
- What are all the lines?
- The creases the folding makes: both diagonals, the four corners folded to the middle, and the quarter lines. They are not marked mountain or valley — crease every line both ways.
- How is the lid sized?
- The lid square is drawn slightly bigger, for a box two board thicknesses plus the clearance wider, so it slides over the box.
- Will it print?
- Each square prints on its own A4 or US Letter sheet at the size it opens with. Use thin paper, origami or 80–100 gsm; card is too stiff for the corner folds.
Print your own design on it
Add a logo, photo or pattern in the panel on the left and drag it onto the masu box. It is trimmed to the cut outline, embedded properly in the PDF, and never leaves your computer — most free template sites hand you the outline and stop there. How printing your own design works.
Templates like this one
See all 87 templates · For Canva · For Cricut · For Etsy sellers · Getting it printed
Collections: Wedding and party favour box templates · Christmas box templates · Food box templates