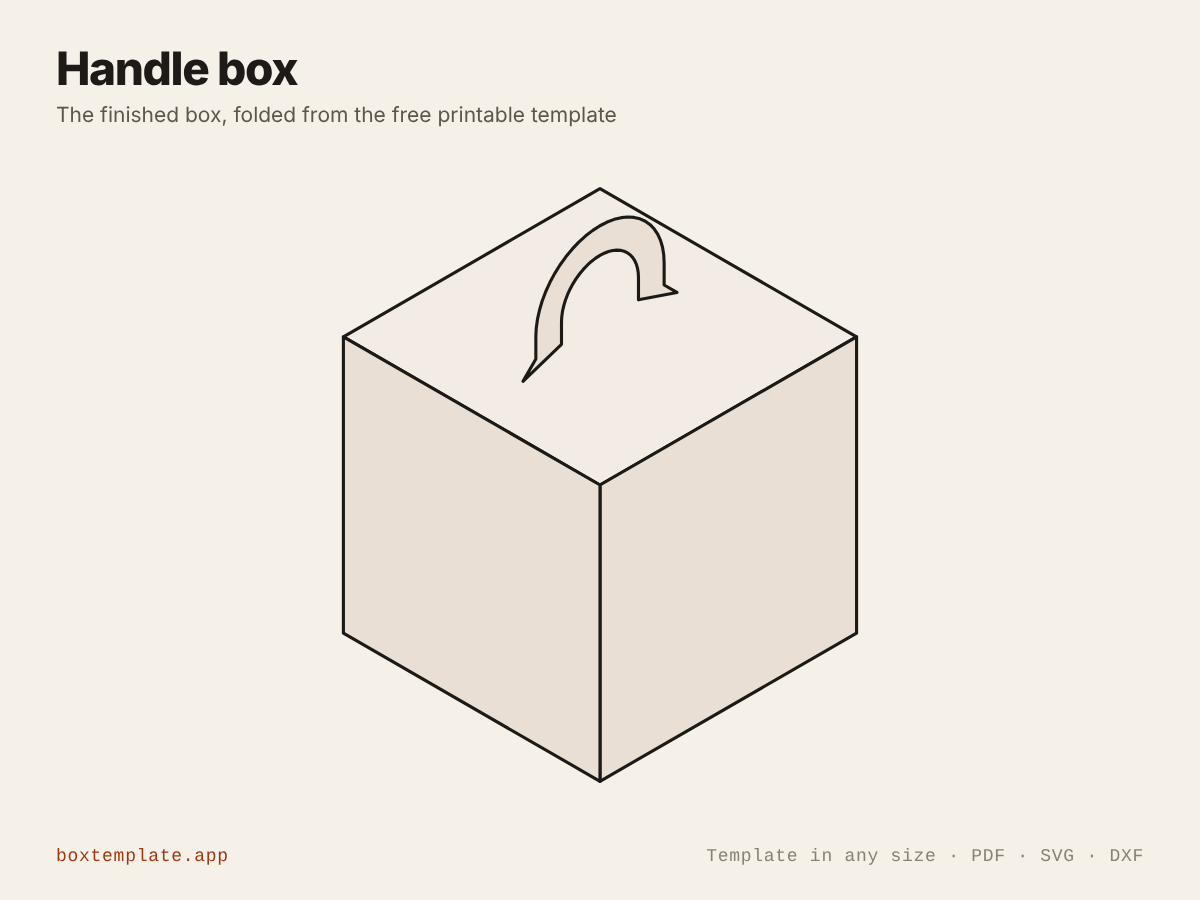
The handle box template, flat and folded
What this template is for
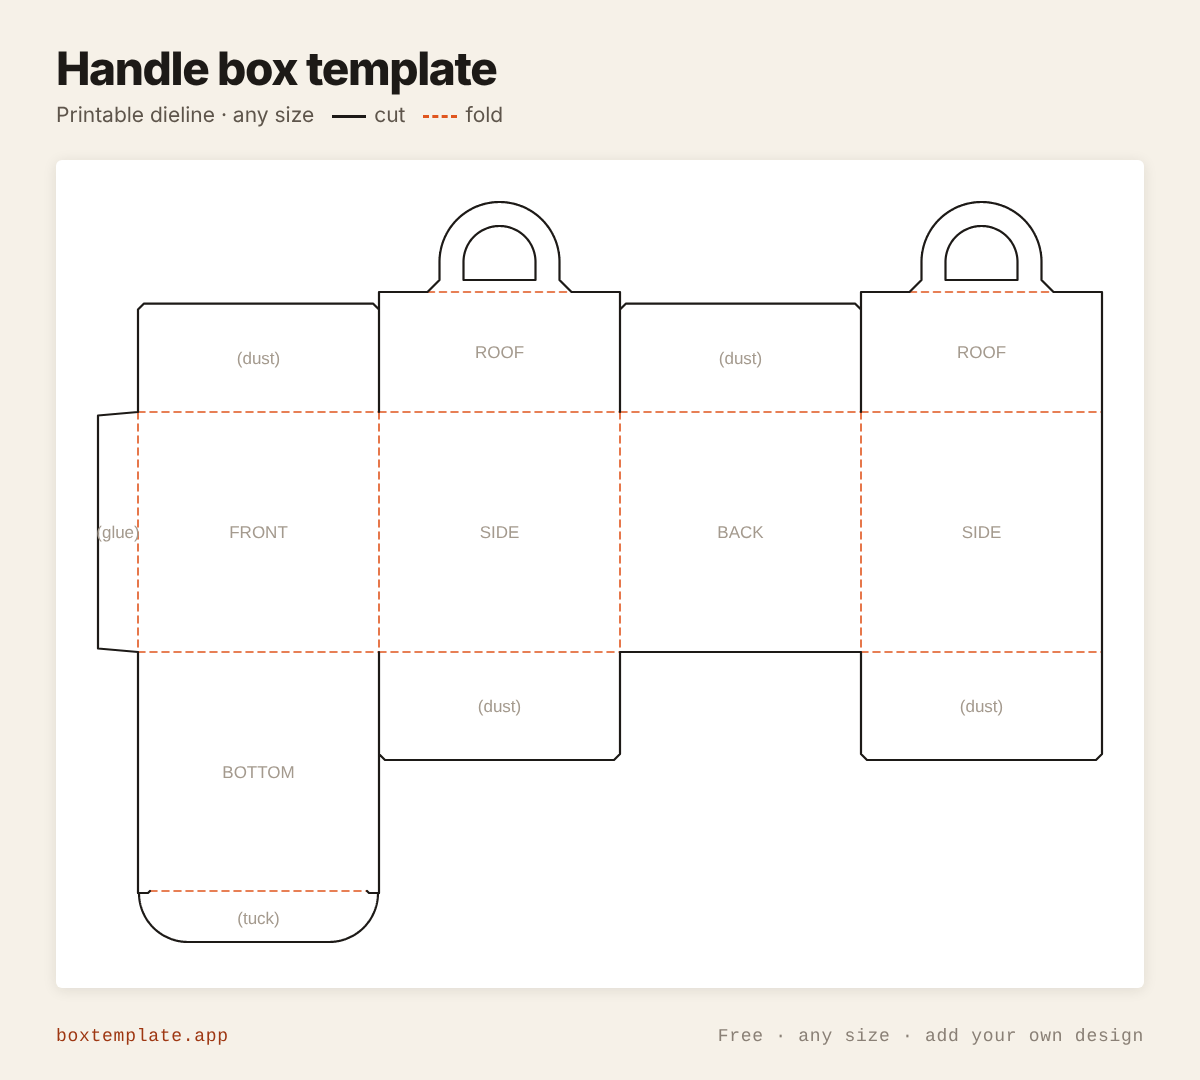
A carry box: the two end walls fold over into a roof that meets in the middle, and carry on up into two handle plates that stand back to back with their grip holes lined up. Cake and pastry boxes, party favours, gift boxes that have to be carried.
Also called cake box with handle · carry box · party favour box · box with a handle — all the same shape, and this is it.
- Cake, cupcake and pastry boxes
- Party favour and goodie boxes
- Gift boxes that have to be carried
- Takeaway boxes for a small food business
How to use this template
All four downloads are the same handle box at the same size — only the format changes.
Which file goes where: PDF, PNG, SVG or DXF
- PDF printing at home
- Print at 100 per cent, or hand it to a print shop as "actual size, no scaling".
- PNG 300 dpi Canva, Photoshop, Procreate
- Upload, lock it in place and design your handle box on top. Free plan and phone included. Full Canva walkthrough →
- SVG Cricut, Illustrator, Inkscape, Affinity
- Vector, with cuts, folds and labels on separate layers. Cricut and Silhouette walkthrough →
- DXF Silhouette, laser and vinyl cutters
- Two layers, CUT and FOLD — and the one free Silhouette Studio Basic will open.
Getting it printed properly → · Putting your own design on it →
Printing it
- Type your size above, then download the PDF.
- Print at 100% — never “fit to page”, or every measurement comes out wrong.
- Too big for the paper? Pick your paper size and leave Fit the pieces to the page ticked: each piece gets its own place on a sheet and the PDF comes out with every page in it, nothing cut in half and nothing to tape.
How to put it together
These pictures are the handle box itself, not a generic diagram — change the measurements above and the template changes, but the steps never do. The names in capitals are the labels printed on the template.
-
Cut the solid lines
Every solid line is a cut. Do the inside shapes first, while the sheet is still whole and easy to hold.
-
Score every dashed line
Dashed lines are folds. Score each one first — an empty ballpoint against a ruler — or the card cracks along the outside of the bend.
-
Step by step
- Cut the outline and the grip holes in the two handle plates.
- Glue the (glue) flap inside the far wall to make a tube.
- At the bottom, fold the two (dust) flaps in, bring the BOTTOM over them and push its (tuck) down inside the BACK wall.
- Fill the box. Fold the two top (dust) flaps in.
- Fold both ROOF panels over so they meet in the middle, turning each handle plate up where it meets the other.
- Glue the two plates back to back with the grip holes lined up, and carry it by both at once.
Glue: a glue stick for paper, white PVA on card — hold each seam thirty seconds, and let it dry before you use it.
Questions about the handle box
Is the handle strong enough to carry?
It is as strong as the board you cut it from, because it is not a glued-on strap — the two end walls carry on over the roof and up into the handle, so the load runs straight down the walls into the bottom, and the two plates glued back to back make the grip two boards thick. On thin card keep the box light; on 300 gsm or cereal-box card a cake will not tear it. Widening the strap helps more than making the handle taller.
How does the top close?
The two end walls each carry on into a roof panel half the box long, so folded over they meet down the middle and cover the whole opening, with a dust flap from each long wall underneath. Where they meet, each roof turns up into a handle plate; the two plates stand back to back, the grip holes line up, and a dab of glue between them makes the handle two boards thick. The roof depth is worked out from your measurements — there is no setting for it, because a roof that does not reach leaves the box open.
Can I make the handle bigger?
Yes. Handle height is how far the arch rises above the box, handle width is how wide it is across, and strap width is the thickness of the arch itself. If you ask for an arch wider than it is tall, the width is reduced so the arch still finishes above the shoulder it springs from.
Why is the bottom panel as deep as the box is wide?
Because it has to reach the far wall. A closing flap shorter than that leaves a gap you can put your fingers through. The tuck setting is only the small tab on the end of it that goes down inside.
Templates like this one
In these collections: Food box templates · Diwali mithai box templates
Guides: Boxes without glue
See all 150 templates · For Canva · For Cricut · For Etsy sellers · Getting it printed
Collections: Wedding and party favour box templates · Christmas box templates · Food box templates · Diwali mithai box templates